
Monday, 10 December 2012
Bob Dylan painting
This painting had been sitting on my easel for about 6 months and today I finally go around to finishing it. It's about 50cm square and is acrylic on canvas.

I just love Bob Dylan.
Friday, 23 November 2012
Origami Portrait - progress
Well, it has, once again, been far too long since my last post. But exams are over and I'm beginning to regain ownership over my brain so I just wanted to share my progress on my origami portrait. You can find the original post with the method to my madness here.


It's starting to look quite impressive I think, and I've recently realised how huge it's going to be, which is daunting but exciting. Wish me luck, a few thousand more boxes to go
Thursday, 13 September 2012
Another Yarn Winding Project - Cactus
I bought this cute little cactus a while ago, but the pot it was in was nothing special, and I'd been meaning to wind some yarn around it to make it look pretty. There are so many possibilities for this crafty idea. It's just a matter of gluing as you go. I imagine I'll be doing a lot more of it. Anyway, here are the results.

.JPG)
See my other yarn winding project here
Monday, 3 September 2012
Inspiration from my garden
The weather is paying attention to the seasons and today is a beautiful sunny and crisp spring day. I haven't been in the garden most of the winter (except for some half-hearted hoeing) so today I got stuck in. It's the first time I've had a garden of my own and it's great to see some of the fruits of my labour come into play. Not to mention, Mother Nature has been out there doing some work of her own. Anyway, here's some inspirational (I think) pictures. I'd be doing some watercolours from such inspiration if I didn't have stupid university work to do :(


Our cherry tree is blossoming!


We have a beautiful bushy lemon tree with loads of tiny wee lemons on it. They're good to look at and dynamite in my cooking.


This the new sprouting of my pumpkin seed, that I got from a pumpkin I used for soup and dried out. I had almost given up on it sprouting, then one day I looked and there she was. Seeing a new plant sprout is as wonderful today as it was when we grew beans in primary school.

My cabbages are growing like crazy. Can't wait to eat them.

I bought a whole bunch of snow peas and only one has survived. But that one is rather lovely.


And finally some other general greeny goodness.


Baby beanie
Thought I'd share a picture of my latest model, my too-cute little step-nephew, Leo. He's modelling a green beanie I made for him. Baby beanies are even more fun than full size ones because they come together even faster and look even cuter. Nothing to it, just do a big beanie pattern but with less stitches. Go here to see my beanie pattern. I cast on about 90 stitches for the baby beanie and made it a bit shorter.


Wednesday, 29 August 2012
Knitted Slouchy Socks
Winter's coming to a close down here and I've only just finished my slouchy socks. Anywho, here they are. I used a lovely multicolour yarn in muted tones, and they're just basic socks with a pattern of knit three, purl three. It's also an uneven thickness wool so they ended up looking rough and rustic, which charms me :)


These are the boots I knitted them for, but I can also imagine a future running around in tights and these big socks at home because they make me feel cute and comfy :)


Thursday, 12 July 2012
Watercolour Takahe Painting
This one is twice as big as the other two paintings in the previous two posts. The bird is much larger than the other two as well, so it seems appropriate. I'm really enjoying painting these, but I'm back to university on Monday so expect not to hear from me for a while.


Wednesday, 4 July 2012

Monday, 2 July 2012
Watercolour Fantail Painting
I'm on university holidays and have been itching to do some arty stuff so I settled on having a go at some watercolours of New Zealand birds. I've started off with a fantail, which is a bird I think no one dislikes.

Hopefully more to come!

Tuesday, 26 June 2012
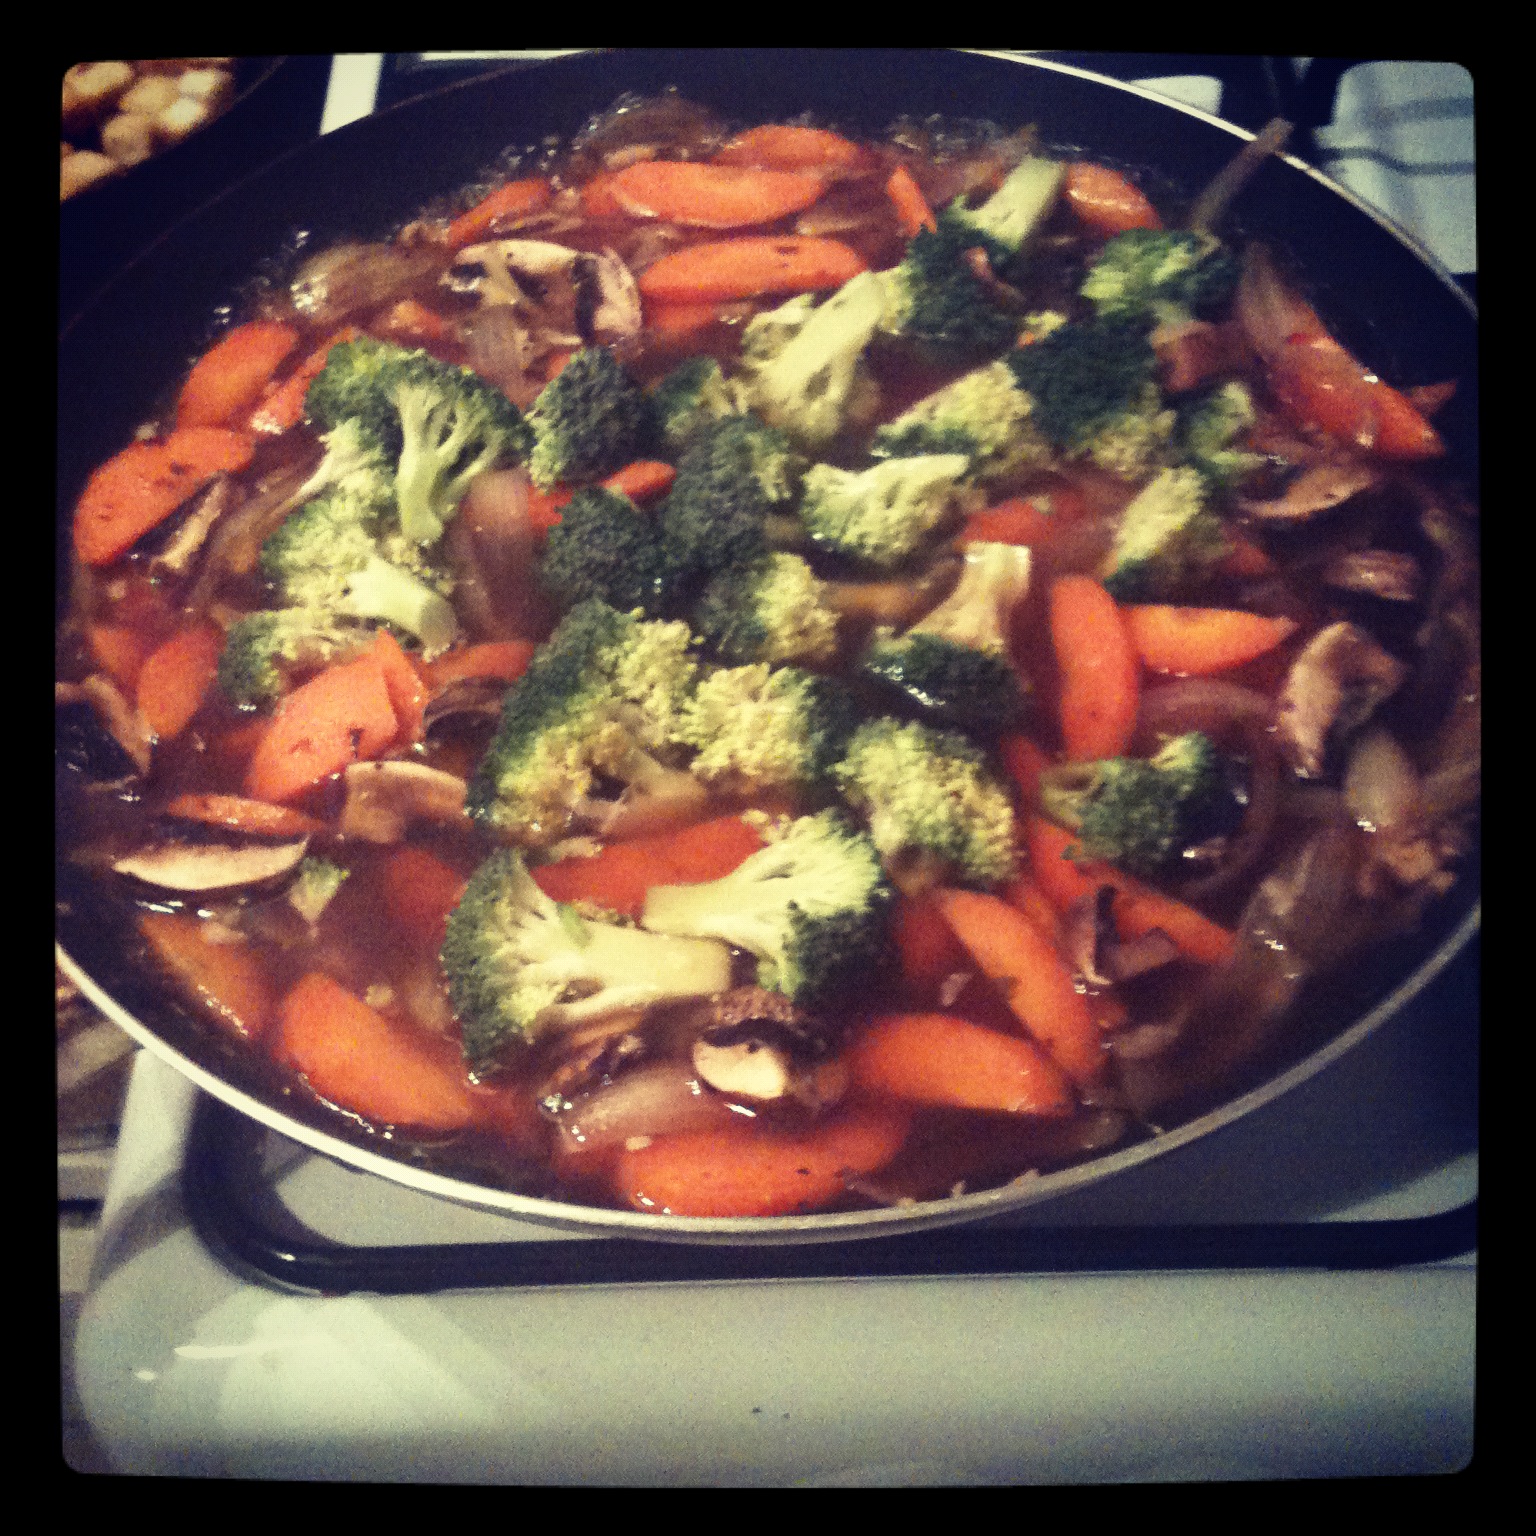
Sweet and Tangy Tofu Stir-Fry
Stir-fry's are awesome. That is a fact. Anyone who disagrees simply hasn't tasted one of my stir-fries. There, that's my bragging, now here's the recipe.


All my stir-fries (and all good ones I think) have a base of soy sauce, vinegar and sugar. This makes them salty, tangy, and sweet. The best.
I'm sorry, I don't measure, so I'll try give you a bit of an idea how much of each ingredient I used, but it's really up to your taste buds, just keep tasting as you go :)
Ingredients:
garlic, ginger, onion, mushrooms, brocolli, carrots, lemon
soy sauce, vinegar
herbs of your choice, brown sugar, salt, cornflour, chilli
tofu, cashews
Ingredients:
garlic, ginger, onion, mushrooms, brocolli, carrots, lemon
soy sauce, vinegar
herbs of your choice, brown sugar, salt, cornflour, chilli
tofu, cashews
1. Dice up some garlic (I used 4 cloves) and roughly chop up an onion. (Also grate up some ginger unless your using jarred stuff like me).

2. In a pan put approx a cup of water, 1/4 cup of white vinegar, 1/4 cup of brown sugar, the garlic, ginger (1Tbsp), and the onion.

3. Add some herbs (I used sweet thai basil, mint, and coriander) and chilli (flakes/ground/fresh), and cook until it reduces down quite a bit and starts to get sticky.

4. Add about 1/3 cup soy sauce, 3/4 cup of water, and the veges you want to use (I used brocolli, carrots, and mushrooms). Cook until the veges are tender and the sauce has reduced down again.
5. While the veges are cooking, cut up some firm tofu into approx 1cm cubes. Put them in a plastic bag with some cornflour and salt. Toss to cover. Fry in a pan on high heat with a decent amount of oil until browned.

6. When the veges are nearly ready add in the tofu and some lemon juice, cook until combined and the tofu has taken on some of the flavour of the sauce.

7. Serve on white rice with cashews sprinkled over it. Yum!

Wednesday, 20 June 2012
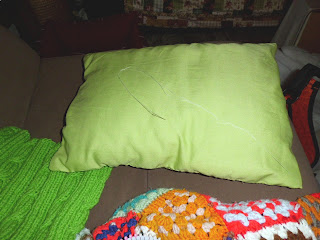
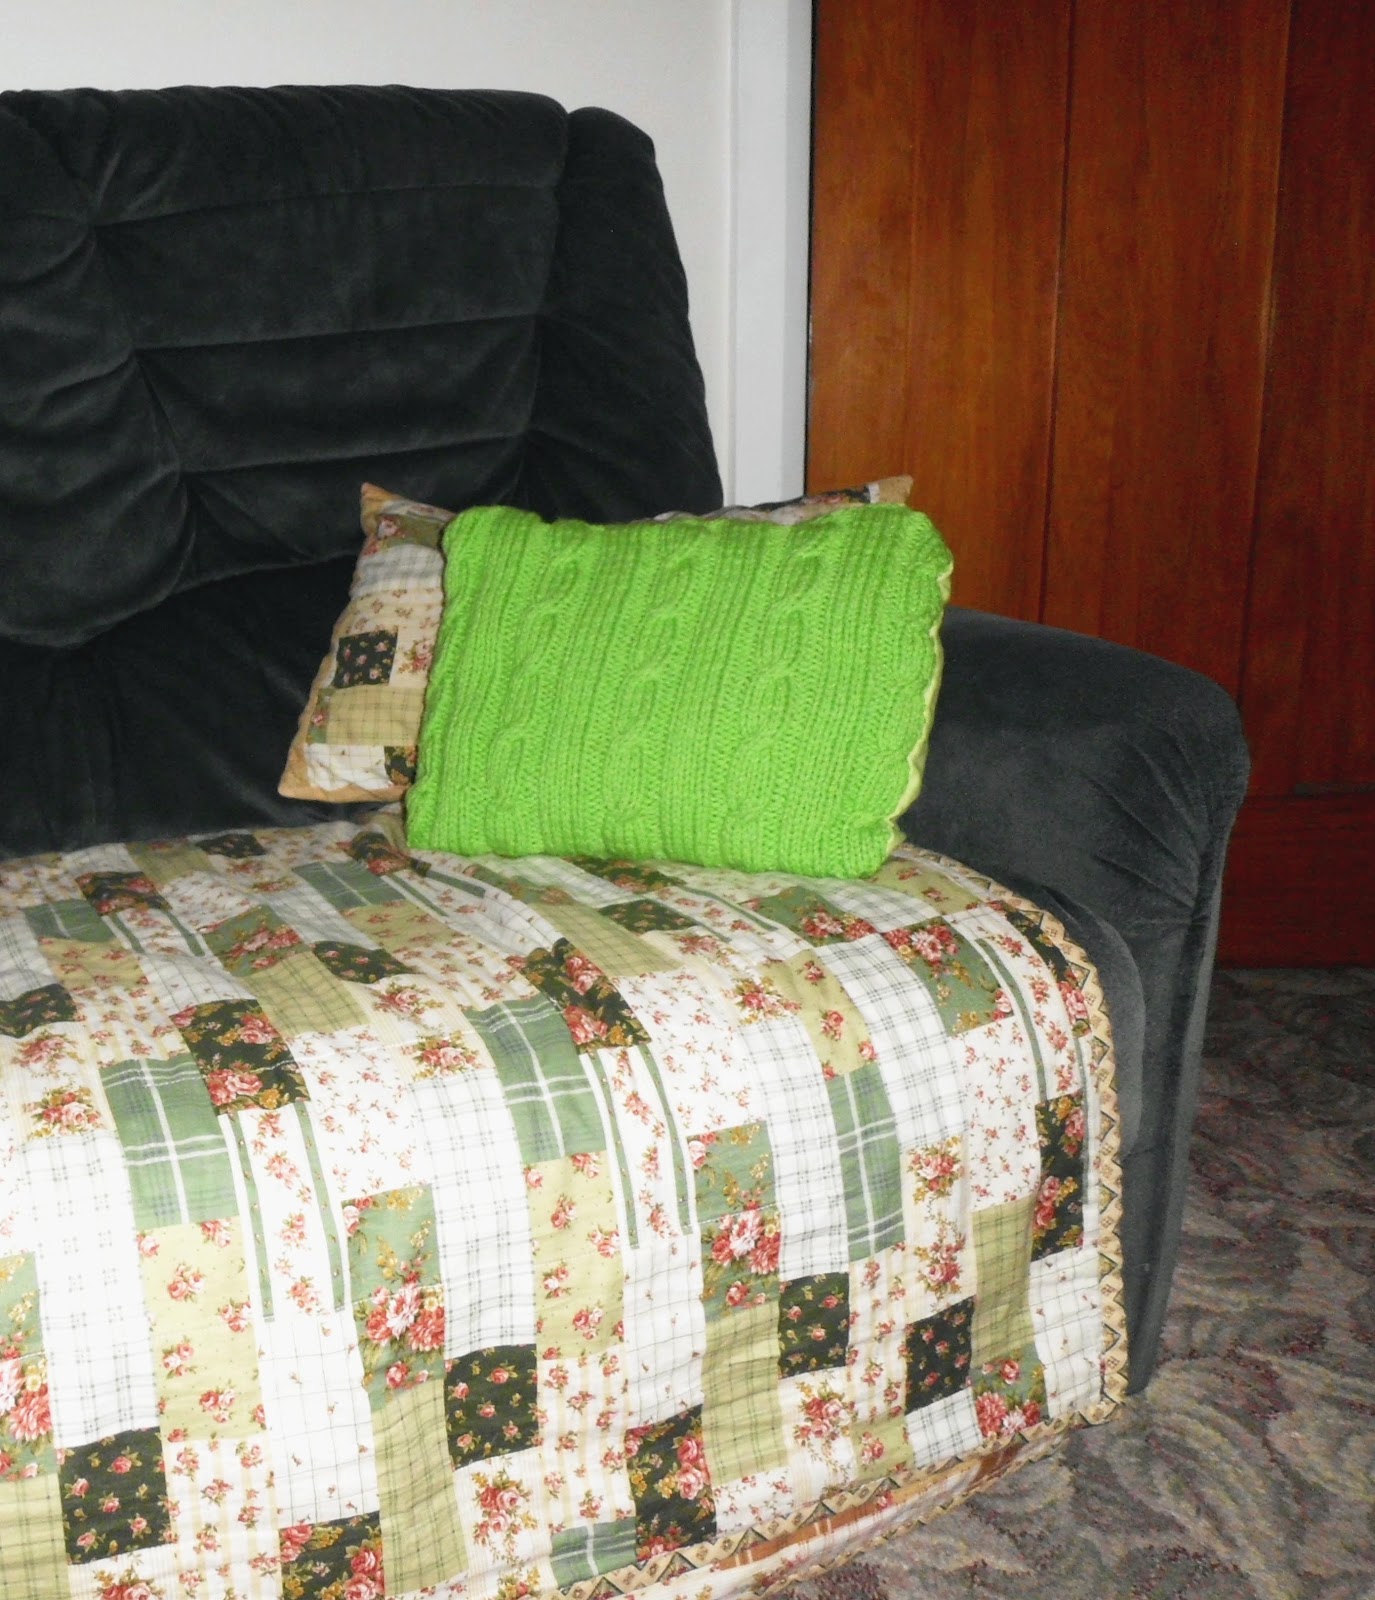
Knitted Cushion
I'm desperately in need of some cushions for my couch and as we recently got new pillow inners for our bed I thought I could use the old ones for cushions. Knitting a cushion cover is super easy, it's as simple as casting on enough stitches to cover the width of the cushion (I'm halving the pillow inners), deciding on a simple pattern, (I did some cabling, but a plain knit would look equally lovely and homey) and knitting until it can fold over and fit the inner. Sew together two sides, so it's a pocket, slip in the inner, and sew it in. Easy peasy. It's pretty quick and satisfying.
I doubled the wool to give a chunkier knit, and I also ran out of yarn so I just made the front, and sewed it onto a cushion cover I made out of fabric. I also intend to make many more, and shall post when I do. :) So here's the steps in photographic form:


I doubled the wool to give a chunkier knit, and I also ran out of yarn so I just made the front, and sewed it onto a cushion cover I made out of fabric. I also intend to make many more, and shall post when I do. :) So here's the steps in photographic form:
1. Cut up the pillow inner into the size you want.

2. Sew up the fabric to cover the cushion, into a pocket, leaving a strip unsown (I used the fabric that was on the inner as a lining, and to show me how big to make it)

3. Turn inside out and stuff with pillow inner piece.

4. Hand sew up the opening carefully.

5. Pin the knitted front onto the cushion, stitch on carefully.


6. Have a super-duper enjoyable time with your new cushion. I had a photo-shoot to celebrate :)

Thursday, 24 May 2012
Easy vegetarian lasagne (some assembly required)
A few days ago I was thinking about dinner and hadn't planned anything, but our garden's producing copious amounts of silverbeet at the moment, and I realised with that and a few other ingredients I conveniently had around, I had the making of a lasagne. And it turned out blimmin' delicious (in my own humble opinion). Anywho, I thought I'd share.
I'm a vegetarian, which is why I made it vegetarian, but I also think mince overpowers tomato-ey dishes (ie. mexican, spaghetti bolognese, lasagne) and that it tastes better without. So meat eaters should give this a go too.
Ingredients:
For the tomato sauce:
- two cans chopped tomatoes in juice
- 5 cloves of garlic (suit to your taste)
- a splash of vinegar (I wish I had a less vague measurement to give you but a splash is how much I put in all my tomato dishes)
- a dash of red wine (any will do, and this is another one of those measurements - you don't want too much or it overpowers the sauce, but it adds depth like no one's business)
- 1/2 teaspoon of sugar
- plenty of salt - to taste (I was using rocket in the lasagne so I didn't pepper it, I'll leave that up to your excellent discretion)
- some olive oil
(By the way, cook the above recipe for an hour or two and you've got yourself a lovely rich pasta sauce, just add fettucine and some cheese)
Other stuff:
- 250g pasta bows (this is what I used and it turned out great and is a lot less fussy than sheets, but again, up to you)
- 5 leaves of silverbeet (of course you can use less or more, or substitute with spinach if you like, etc.)
- a bit of rocket and italian parsley (but you can add any herbs you like, oregano might be nice for example)
- 250g tub of cottage cheese (I know ricotta is more traditional but I had cottage cheese on hand)
- some tougher cheese to crisp up on top - probably parmesan is the way to go, but I'm a poor student so I went for colby, and it was terrific :)
Method:
- Get a big pot heating up for the pasta, make sure you salt it well, I think it's amazing how much better the pasta tastes when you've put a good tablespoon of salt in there, or more!) Chuck in your pasta when it starts boiling. Make sure you keep an eye on it and drain it and cool it with some cold water when it's tender but still has some bite (just eat some to check - should be around 10 mins).
- Combine all the ingredients for the sauce in a new saucepan. Keep this cooking (stir occasionally) while you prepare the rest of the food.
- Cut up your silverbeet into thin strips (don't need to be fussy, just so that it can be sprinkled into layers. Cut up your rocket, parsley, or other herbs.
- It's time to layer. I used a deep small casserole dish. So, now put half the silverbeet in the bottom of your baking dish, then some dollops of cottage cheese (about a quarter of the tub), then some tomato (about a third) and some rocket and parsley, then half of the pasta. Repeat those layers once more. On the top goes the rest of the tomato mix, then the rest of the cottage cheese (so there's a nice thick cheesey layer on the top, yum!) the rest of the herbs, and a smattering of other harder cheese to get crispy in the oven.
Now it should look like this:

Yum. Put it in the oven at medium heat until the cheese on top is golden. There's no set time, especially because everything is already cooked. You could grill it if you wanted to, but baking it for 20 minutes or so lets all the flavours meld together.
So the final product:


It doesn't look that flash on the plate, but it tastes pretty flash.
Enjoy!! I did.
Monday, 21 May 2012
Cabled beanie pattern
I seem to forever be making beanies for the same people. Mostly its because the negligent owner has misplaced it, but my brother's new puppy chewed a good sized hole into his, so I thought that was a good enough excuse to warrant a new one. This is it.

It's quite long and skinny, but that's what you want for a boys beanie (unless he's a hipster and wants a slouchy one). By making a beanie this shape, it should be nice and fitted and still reach his ears.
This pattern was just knit 6, purl 3, knit 3, purl 3, repeated 7 times.
Then every fourth row I'd need to do the cabling: pass three onto a cabling needle, knit 3, knit the 3 on the cabling needle, purl 3, knit 3, purl 3, repeated.
If you've got cabling, you should start (or end) with that, so it is along the edge of your knitting. This will make it tidier when it comes to sewing up the beanie at the end.
I used no. 4 knitting needles, and they're my go to size.
And that pattern was repeated seven times giving me 105 stitches. 105 is a good number of stitches for a fitted beanie with large cabling. If you have no cabling, more like 95-100 is good. And when I'm making slouchy losser beanies for girls I head for around 110-115.
When you've made a straight piece for about 25cm, you should start reducing down for the top of the beanie.
There are plenty of different ways to do this and I can't remember the exact numbers I used for this beanie, but I usually do it as follows:
Continue the knitting for 5 stitches, then slip one stitch, knit two together, and pass the slipped stich over (ss, k2tog, pssso) (this turns three stitches into one), then knit again for 9 stitches and repeat, ss, k2tog, psso, knit 9.... and so on, hopefully at the end you will be left with about 5 stitches (not a big deal if that's not the case)
Continue your pattern (adjusted to accomodate the missing stitches), for a row.
The next row knit 4 stitches then (ss, k2tog, psso, knit 7) repeat to the end.
Continue pattern for one row
The next row knit 3, (ss, k2tog, psso, knit 5) repeat to end.
Continue pattern for one row
Next, knit 2, (ss, k2tog, psso, knit 3) repeat to end
Continue pattern for one row
Finally knit 1, (ss, k2tog, psso, knit 1) repeat to end
This will create decreases above one another, so that it looks tidy.
Hopefully you will have left around 11 or less stitches (if more, p1, p2tog, and repeat for one row). Now just cut the yarn and thread it through the remaining loops and pull tight. I usually cut the yarn to leave a longish bit hanging off for sewing up the beanie, but cutting it off and sewing up the beanie with thread is equally sane.
Hope this inspires beanie making in you. I think they're so quick and wearable, they're very satisfying to knit.
Tuesday, 15 May 2012
Saving $$ On Yarn
I love knitting but all the yarns I crave are mightily expensive. So generally I buy cheap cute colours and pretend they're just as good. But recently, a very special Aunty (Mandy, if you read this, thanks!) of mine made a suggestion that I thought was blimmin' brilliant.
The idea is to scour the charity shops (like you would for old clothes still bursting with awesomeness) and look for good quality knitwear. Most knitwear is made in pieces and then sewn together so you only need unpick it and it should unravel beautifully. I did this with a big jumper recently that cost me $15 and now I've got three big balls of luxurious glossy cream yarn.
One thing I would advise (although I haven't tried) is that I don't think this would work on mohair or the like, I know I've always struggled to undo anything I've knitted out of that sort of yarn, all the fluffy hairs get all tangled.
I was also recommended that this is a good way to get your hands on some quality buttons.
Happy hunting!
Sunday, 13 May 2012
Red-Breasted Robin Painting
Mother's Day has just been and I decided to paint my mum a picture. I also had been wanting to do another bird painting, since university has been forcing me to watch while it eats away at my beloved crafting time. Anywho, since I thought you might be interested, and because this blog is a mess of blatant self-promotion I thought I'd post a photo of it.

PS Love you mum!

PS Love you mum!
Tuesday, 17 April 2012
Origami Portrait - beginning
Hello,
It's been a while. We've just moved into a lovely old house so close to the zoo I can hear the lions roaring at night, so although it's a nice place to be, it's been a bit hectic lately. I've also had much trouble setting up the internet here, but no matter, because I have been on uni holidays, and the break from the distractions of the internet has allowed me to make a good beginning on my new project. The idea came to me at uni one day when I was waiting for a lecture to start. I'd found this tutorial a while ago when I was making christmas crafts and I began thinking that I could make boxes from squares of old magazines and turn them into a portrait. It wasn't until a good few days into this project that I realised how big the task is. But I'm hoping the payoff will be equally large.
So I started off by gridding up the picture I want to recreate, and deciding what shades and colours I would use. I decided on three shades of skins colour (so I wouldn't be completely overwhelmed trying to find exact shades in the magazines), hair colour, black and white, and a background colour - blue. Here is the grid.

I copied it into a maths book to help define the shades I would use, and expand the picture, to make sure the final product would show the detail of the glasses.
Next I had to go through a heap of magazines to find pages with the right colours/shades.

These were cut so that I would get lots of squares of the appropriate colours. I started by drawing up the grids on the magazines and cutting it with scissors, but soon found, a craft knife a lot faster, and use the width of the ruler as the length of the sides of my squares, so there's no need for measuring and ruling, I just lay the edge of the ruler against the edge of the magazine and cut down the other side of the ruler with the craft knife.

So now I had to fold the boxes. Here's that link to the tutorial again.


Cute, aren't they? They're about 1cm wide, and 5mm high.
So then I have to separate them out into the three shades of skin colour:

and all the other colours:

And finally I have begun to glue them together, following my pattern. If you look with the right kind of eyes, you can tell that the part I've completed is his left eye and some of his glasses.

Hope to bring the finished project to you soon! (but not too soon, because I have another few thousand boxes to make - wish me luck)
See my progress here
Subscribe to:
Posts (Atom)